My Philips Transcription Kit Just Arrived
We work with transcriptionists almost every day, and we’ve noticed that they are often responsible for learning how their software works without any training. In light of this challenge, we wanted to provide some assistance for any transcriptionist who’s just been thrown into the deep end.
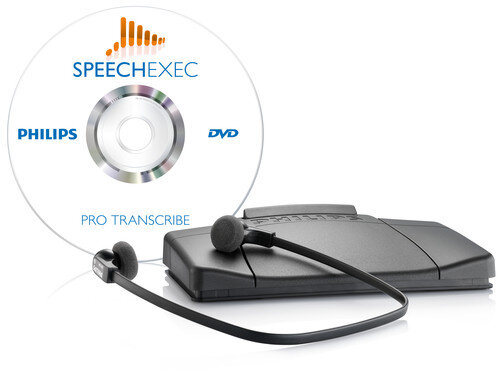
Today, we’re exploring the Philips® LFH7277 Transcription Kit. If your office just received one (or several) of these kits, this article is a great place to start.
There are three parts to the LFH7277, and we’ll touch on all of them:
- Software (an installation disc)
- Headset
- Footpedal
Our goal today is to help you understand what you need to do with this new transcription equipment, and help you feel a little more confident about how it works. Consider this a very basic training.
Please note that for the software, we’re only looking at the Windows® side. If you want information on the SpeechExec for Mac® application, click here.
Information about using Philips software with Dragon®, which is a little more advanced, can be found here.
The Software, Pt. 1
We’re going to start with the software, because everything that you’ll be doing is going to center around it. What we aren’t going to do too much of here is discuss how to install and configure it. We do provide installation services, and we have additional information on setting up the software here and here.
Our goal for the software portion of this kit is to make you familiar with its layout, breaking it down pane-by-pane. There are a few housekeeping items to cover first.
The Disc
SpeechExec Pro Transcribe 8.8 is the latest version of the release 8 transcription software—but you probably received a disc with a slightly older version. You can verify what you’ve installed by clicking on Help > About in SpeechExec. Or, just look at the disc itself.
If you don’t have the latest version, you’ll need to check for updates. You should be prompted to do this right after the program installs. Alternatively, you can go to Settings > General Settings > Updates > SpeechExec and click on “Check Now.”
Here are all the supported operating systems for SpeechExec Pro 8.8:
- Windows 10 (64-bit only)
- Windows 8 and 8.1
- Windows 7
Note: You must have at least version 8.7SR1 if you are running Windows 10.
How Do I Get Dictations?
We want to cover delivery methods, because it’s crucial for your setup to know which one you plan to use. Also, understanding how dictations come to you will help with troubleshooting problems. Each delivery method has its own common issues.
Note that our suggestions in each section are just a place to start, not a definitive diagnosis of any given problem.
One or more authors are sending emails to your account, with dictations attached. They may be doing this from a computer, using the Philips SpeechExec Pro Dictate software, or a smartphone, using the Philips Voice Recorder app. If you aren’t receiving your dictations, one of the first things to do is check your email account to see if they are actually there.
SpeechExec Pro 8.8 is officially supported with these versions of Microsoft® Outlook: 2016, 2013, 2010.
Networking
This means that your office uses some type of network storage to share dictations, including shared folders and file servers. If you can’t share files, your network may be disconnected or down.
Download
This means that the author is handing you a recorder to plug in to your computer. You download the files directly. If this isn’t working, the recorder might not be properly configured, or may require a firmware upgrade.
FTP
This means that you’re using an FTP server to move files between directories. This method is rarely used, but can be effective in high security and high traffic workflows.
Get Philips Transcription Support
Why not let one of our Philips experts help you install and configure your LFH7277 Transcription Kit? We can get everything up and running, and then train your transcription team on how to use it.
Get Philips Support
The Software, Pt. 2
Now, as promised, we’re going to look at the user interface. Remember, we’re not doing a deep dive here; rather, we want to help you get oriented and feel comfortable. If you want to dig in on a particular setting or feature, please consult the SpeechExec Pro Transcribe manual.
The Menu Bar
The menu bar, at the very top of the SpeechExec window, is the place where you can access most of the settings, features, and configurations for the application. While some of these are available elsewhere, here’s where you’re sure to find them.
In this article, whenever we give a location for a particular setting, you’re going to start from the menu bar.
The Folder Window
Here are some quick folder window tips:
- Hide any folders you don’t need by going to Settings > General Settings > Worklist > Folders.
- If your folder window disappears, click View in the menu bar, and then make sure that “Folders” is checked.
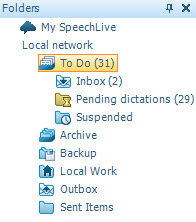
Here are the folders you will probably see in this window:
My SpeechLive
SpeechLive is a cloud storage and dictation delivery service from Philips. See more here.
Local network
This is where all of your pertinent folders are going to be. If it’s not expanded, click the triangle to the left of it.
To Do
This virtual folder is a collection of “Inbox,” “Pending Dictations,” and “Suspended.” It’s not an actual folder itself, and you cannot move it to another file location.
Inbox
This is where dictations arrive by email, if you have email delivery configured.
Pending Dictations
If you’re downloading dictations directly from a recorder, they’ll be filed in this folder. This directory might also be where you find dictations if you’re using networking. Be sure to consult this article for network configuration tips.
Suspended
This is where you’ll find dictations that have been partially transcribed or corrected. Clicking the [Save as draft] button in the player window puts files in a “suspended” status.
Archive
This is where dictations go when you click the [Finish] button (in the player/correction window). It is organized by date in subfolders. If you don’t need to keep old dictations, you can delete them manually, or set SpeechExec to do it automatically. Go to Settings > General Settings > Worklist > Archive & Purge.
Backup
If your author hands you a recorder, and you have it configured to back files up, those files are here. Recorder backup settings are found under Settings > General Settings > DPM Configuration > Downloaded dictations.Note: You can program this folder to purge in the same way as the “Archive” folder.
Local Work
You don’t have to pay attention to this folder unless you’re having network issues—and you use networking to share your dictations. If you do run into that problem, and you’re in the middle of transcribing a dictation, the file may move to this folder.
Outbox
If you send files back via SpeechExec email, which most transcriptionists don’t, they’ll go here before they are sent.
Sent Items
After a file is sent via SpeechExec email, the file ends up in this folder. Again, most transcriptionists won’t use this folder.
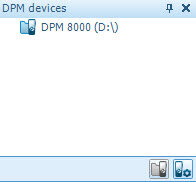
The Device Window
This is where you’ll see your recorder, if it’s plugged in. When you click on the recorder, you’ll see any files that might be on there in the worklist.
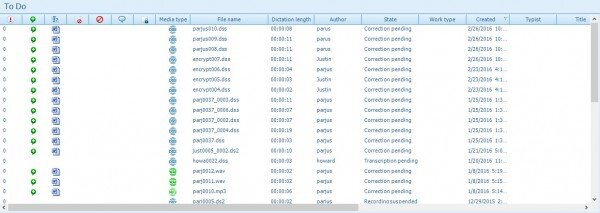
The Worklist Window
This is where all of your work appears. Click on any folder in the folder window to see the files inside of it.
At the top of the window, there’s a row of column headers. These can be moved left or right by clicking and dragging with the mouse. Click a column header to sort your dictations by that value, and click again to toggle between ascending or descending order.
Take note that you can scroll to the right to see more information on each dictation.
The Ribbon
This area has a lot of buttons for quick access to functions and settings—which you can also reach through the menu bar.
The Recognition and Adaptation Queue
This is where you can track files that are currently being processed by Dragon, or are in line to be processed. If you click on the very small tabs (indicated in the picture), you can see if the dictation made it through, if there was an error, or if there’s any data that needs to be passed back to Dragon (for profile improvement).
The Player Window
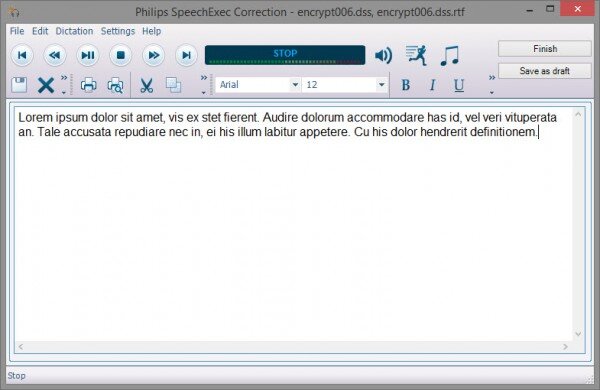
When you double-click a dictation, this window opens, allowing you to play your audio files with either the footpedal or the software buttons. When you’re done transcribing, click the [Finish] button; if you want to save your place, click the [Save as draft] button. You can also close the window and click [Discard changes], to put the file back just as it was.
The Correction Window
This is the same thing as the player window, with one exception: There’s a text box below the player, where you’ll see speech-recognized text printed out. Use your footpedal to listen, like normal, and then make any necessary corrections to the document.
You can configure what to do with the text from there by going to Speech recognition > Recognition settings > Correction settings.
The Headset
The headset is pretty self-explanatory. Normally, you just plug it in and put it on. Just the same, we want to make sure you don’t have to deal with a common problem: no sound.
Here are some quick troubleshooting tips.
- Check the jack and make sure that you’ve plugged the cable into the headset input, not the microphone input.
- In the player window, click the speaker icon and make sure that the volume is up.
- In the player window, look at the volume meter in the top center. The horizontal audio meter should be moving, producing a green/yellow line that follows the speaker’s voice.
- Check the system tray at the bottom right of your screen. This is where the computer clock normally displays. Find the speaker icon there and make sure your computer isn’t muted.
The Foot Pedal
We’re going to be talking about two different foot pedals that you’re likely to see in the transcription kit, but they are almost identical in function. All of the buttons work the same way, whether you have an LFH2330 or an ACC2330. They’ve only changed two basic items: the ergonomics and the play switch.
Ergonomics
The center pedal of the ACC2330 is easier to press down from the front. For the LFH2330, it’s easier to press down at the back.
Play Switch
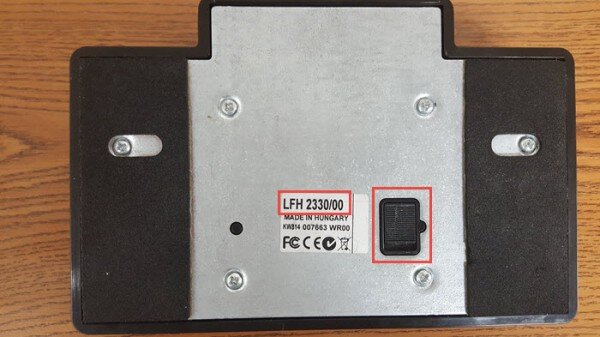
The switch on the back of the footpedal can control whether the playback button needs to be held down to play the dictation, or toggled on and off. It’s not that easy to move the switch on the LFH2330, so they redesigned it for the ACC2330. Much easier now.
Quite honestly, the switch is unnecessary if you have the software. Any configuration you do in SpeechExec is going to overrule the switch position.
Plugging It In
When you first plug the footpedal in, drivers should start to load automatically. You may see some indication of this in the Windows taskbar. Once they’ve loaded, your computer can see the footpedal as a device, and the SpeechExec software should detect it.
If you don’t see the drivers load, and the software doesn’t detect your footpedal within two or three minutes of you plugging it in, try a different USB port.
Speaking of USB ports, make sure to plug directly into the computer; do not use a USB hub. And if you can swing it, try to choose a USB 2.0 port, preferably on the back of your tower.
Basic Orientation
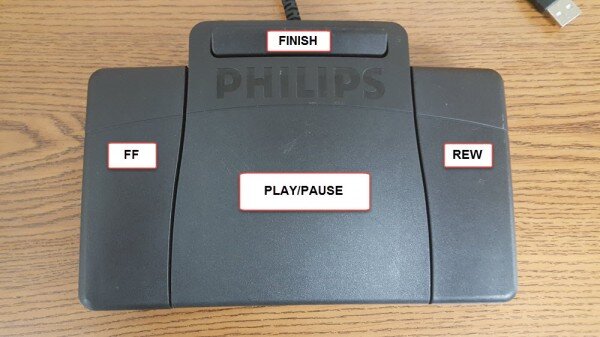
Now that your footpedal is being detected by SpeechExec, let’s look at what the pedals do.
If you want to change the pedal functions, click the footpedal button on the ribbon.
Flipping the footpedal over, there are really only two things of note here: the model number and the play switch.
And that’s everything in the kit.

