Pairing SpeechExec Pro v7 With Dragon
This ‘How to’ guide will walk you through the process of how to configure speech recognition settings for a local user profile within the Philips SpeechExec Version 7. For the purpose of this guide we will assume that you do have a valid version of Dragon installed, with a profile already created.
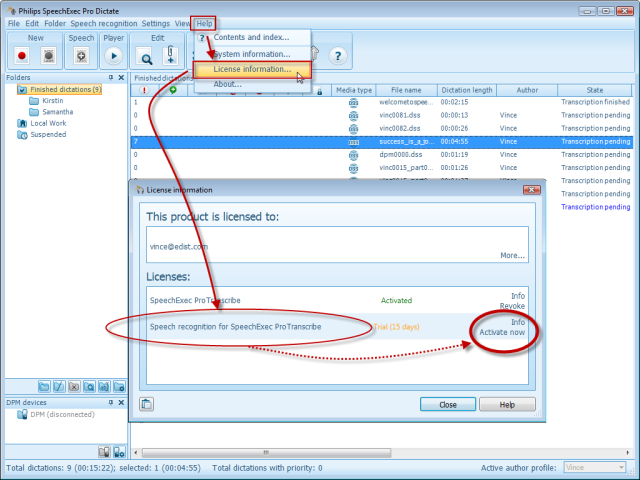
Step 1: Activate your Dragon Naturally Speaking license in SpeechExec Pro.
1. Go to Help > License Information
2. When the license panel comes up, locate the license name “Speech Recognition for SpeechExec Pro.” To the right of the license, you will see the words “Activate now.” Click on this to activate your license.

Step 2: Enable Speech Recognition
1. Go to the menu heading [Speech recognition] > [Recognition settings]. This will take you directly to the Speech recognition setting inside of the General Settings panel.

2. Click the box next to ‘Speech recognition enabled’. If you have already created your profile in Dragon, Philips SpeechExec will recognize your current profile(s). By default, SpeechExec will have “Use local profiles only’ selected. Choose the profile you wish to use from the drop down menu. If you do not have a profile created, choose Create new Dragon Profile. This will start the Dragon application and the panels will walk you through creating your new user in Dragon.
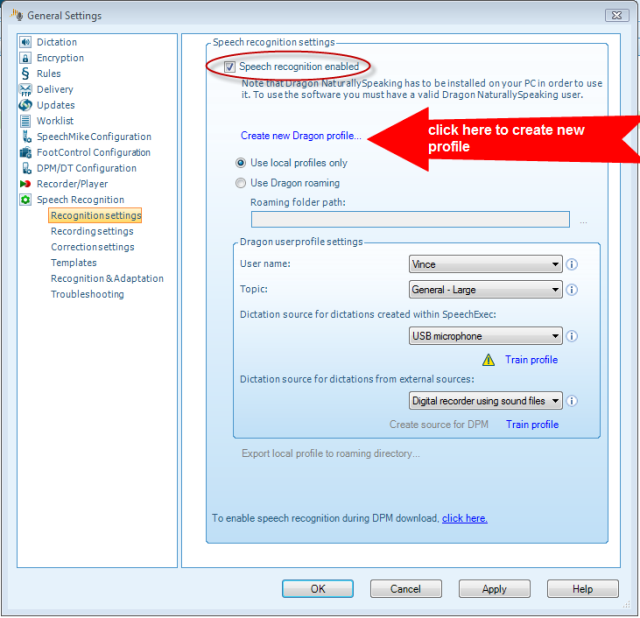
Note: Your user name should be the same as your author name. Topic is your Dragon vocabulary. Philips recommends that you use USB Microphone as the source because it is the only source that can be used for recording dictation files within SpeechExec. Underneath you dictation source is a link to Dragon to train your profile. It is always recommended to train a new profile.