As of 10.19.11, YES
This how to guide will walk you through the process of programming the Philips SpeechMike III with Dragon Dictate v2.5. The SpeechMike III will allow you to automate various features of Dragon Dictate v2.5, which will no doubt super-charge your productivity. Whether you’re navigating through a template, opening applications, inserting text or invoking hotkeys, the Philips SpeechMike III will allow you to get more done is less time.
STEP 1: Download & Install the Philips Speech Control for MAC
Successor of the Device Configuration Tool, the Philips Device Control Center is used to customize the behavior of the SpeechMike III & Foot Control device for various applications. Once the PDCC is installed, the default profile is set for Dragon Dictate v2.5, making it easy for new users to begin using the device.
1. CLICK HERE to download the Philips Speech Control for MAC v2.8
2. Go to where you saved the Philips Speech Control download and double-click to install. A Philips Speech Control window will appear. As illustrated below, drag the SpeechControl icon to the Applications folder just to the right.

This will copy the Philips SpeechControl to your Applications folder
3. Go to the Applications folder.
4. Locate the Speech Control icon and double-click to start. You may receive a message from Apple asking if you’re sure you want to open the Speech Control application. Select [Open].

5. Once you have confirmed the successful installation of the Philips Speech Control application, close it for now.

STEP 2: Create profile in Dragon Dictate using the Philips SpeechMike III
For this guide, I am assuming that you’ve already created a profile within Dragon Dictate v2.5, using another dictation source, therefore; I will show you how to add the SpeechMike III to your existing profile.
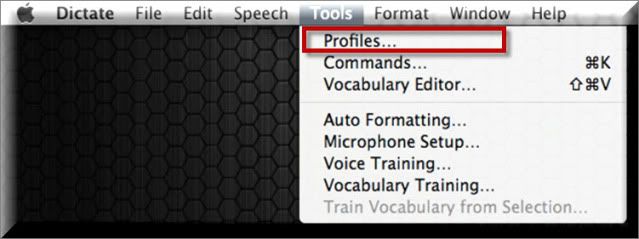
1. Open Dragon Dictate v2.5, go to Tools > Profiles.
2. Once your Profiles window appears, select [+] under Audio Sources.

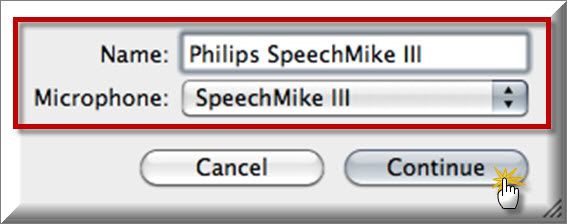
3. This will prompt you to enter a name and select a microphone. Enter [Philips SpeechMike III] and select [SpeechMike III] from the microphone drop-down list then press [Continue].
4. This will add your SpeechMike III source to your profile and prompt you to adjust the audio. Follow the prompt on your screen to complete the volume adjustment process.

5. Once the program has adjusted the microphone properly, a portion of what you read will be played back. Select [Voice Training] and follow the prompts to complete the training process. The training process will generally takes approximately 8 minutes to complete.

6. Select [Done] to complete the training process
This will take you back to your desktop with Dragon Dictate v2.5 running with your Philips SpeechMike III profile open.
Once you’ve completed the two steps above, the SpeechMike III is now automatically configured. In other words, the SpeechMike III is now programmed to control various functions of Dragon Dictate, like controlling the microphone for example.
If you wish to customize the SpeechMike III, proceed to Step 3.
STEP 3: Customizing the Philips SpeechMike III
As I mentioned above, the microphone should now be programmed to work with Dragon Dictate v2.5. But of course, you can change the default configuration to meet your specific needs. To do so:
1. Open the Speech Control Application and select [Application Control].

There are three columns in the Application Control tab
Buttons Event – This is the button on the SpeechMike III that can be programmed
Pressed – This column represents the action that will take place once the button is pressed.
Released – This column represents the action that will take place one the button is released.
2. To change the default settings, select the […] button next to the desired action (i.e. Pressed or Released).
3. Once the ellipses button is pressed, an Edit Operation dialog window will appear.

4. To change the configuration, use the [Add], [Edit] and [Delete] buttons under the Operations steps header.
5. Edit and Delete are self-explanatory. If you select Add, an Edit Operation dialog window will appear with four options:

Hotkey – This will allow you to program a hotkey or a combination of hotkeys
Text – This will allow you to insert text
Dragon Command – This will invoke a built-in Dragon command
Delay– This will tell the system for wait for a specified period of time.
6. Make your selection, then choose [Next] to return to the edit operation screen.
Congratulations, you should be good to go!
Verification Source: In-house testing
Test Date: 10.19.11