In some cases you can perform a repair on the Philips SpeechExec v7.1 software instead of having to reinstall to correct issues such as the software not starting up. In this example, we are going to perform a repair on the Dictate portion. It can be done on both the Dictate and the Transcribe software.
Step 1 Open the Control Panel
1. In your Windows computer, click on the Start button and select Control Panel as illustrated below.
2. SelectUninstall a Program as illustrated below. If inIcon view, selectPrograms and Features or if using Windows XP click onAdd or Remove Programs.
Step 2 Start Repair
1. Find the softwareSpeechExec Pro Dictate and selectRepair as illustrated below. If on XP, selectChange
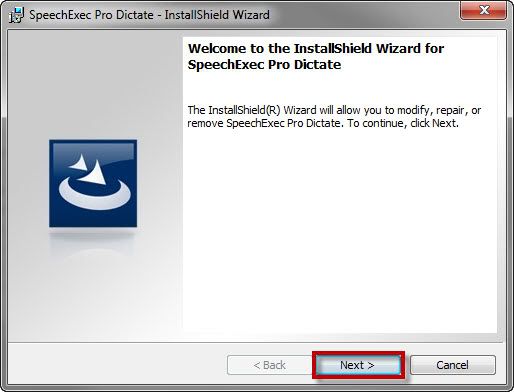
2. When theSpeechExec Pro Dictate – InstallShield Wizard is finished preparing, selectNext as illustrated below.
3. In theProgram Maintenance window, select Repair and thenNext as illustrated below.
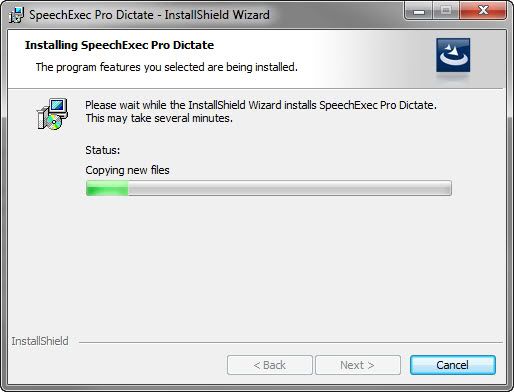
4. In theReady to Repair the Program window click onInstall and you will see theInstalling SpeechExec Pro Dictate window showing the status of the repair as illustrated below.
Step 3 Complete Repair
1. Once the repair is complete, you should see theInstallShield Wizard Completed screen; clickNext as illustrated below.
Congratulations! You are done! Now your SpeechExec software has been repaired. Kick the tires and give it a spin! If the repair does not fix the issue you may have to uninstall and reinstall depending on the issue.
Verification Source: In-house testing
Test Date: 04-16-12


