The Olympus SC1 Barcode Scanner is a plug in module for the Olympus DS5000/id SD card slot. The scanner can be used to enter option item values such as case numbers, patient number and other important information into the file. To use an SC1 with a DS5000/id, you must program a Worktype with Option Items to support the data entry. This illustrated ‘How to’ guide will walk you through the process of configuring the Olympus DS5000/id for use with the Olympus SC1 Barcode Scanner.
STEP 1: Configure the DS5000/id with Worktypes and Author ID
1. Start the Olympus DSS Player Pro Release 5.0.12 Dictation Module.
2. Go to: Tools > Options > Workflow > Author.
3. On the right, you will see an Author List, click [Add] to create an Author ID.

4. Enter your name and select a priority level. The default is set at 7.
5. Click [OK] to see your name and priority level in the Author List.
6. On the left window pane, select [Worktype]. A Worktype List window will appear on the right.
7. Click [Add].
8. A Worktype Property window will open. Enter a Worktype name in the Worktype ID field. Click [Add].
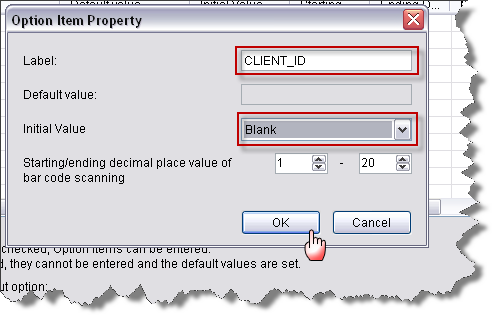
9. An Option Item Property window will appear. In the Label field, enter a label name. Leave the Default Value field empty. Any string can be entered using up to 16 characters.
10. In the Initial Value list box, choose [Blank]. Click [OK].
Note: You will now see your entry in the Worktype Property window.
11. Select [Individual Scanning]. Click [OK].
STEP 2: Transfer your settings to the DS5000/id.
1. Connect your DS5000/id to the computer. Make sure that it’s turned ON.
2. Start the Olympus DSS Player Pro Release 5.0.12 Dictation Module.
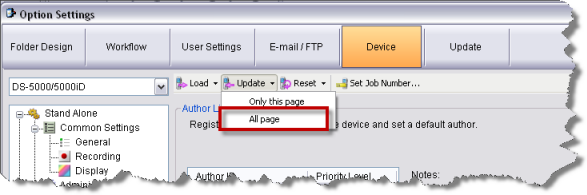
3. Go to Tools > Options > Device
4. On the top, select [Update] > [All Page] to transfer your settings to your digital voice recorder.
STEP 3: Connect the SC1 Barcode Scanner
1. Disconnect the DS5000/id from your computer
2. Turn the recorder OFF.
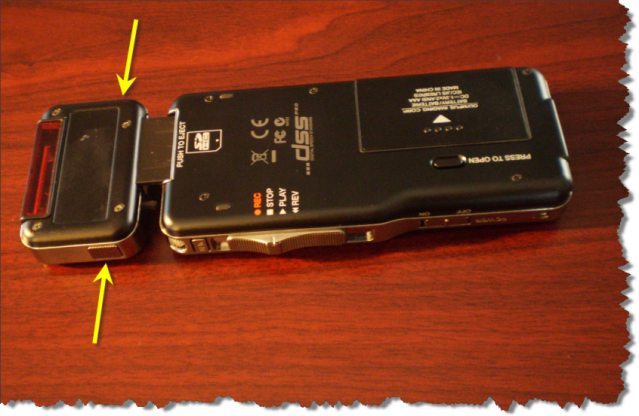
3. Press and hold the two release buttons and slide the SC1 into the open SD card slot on the DS5000.
STEP 4: Scan & Dictate
1. Turn the recorder ON. When you start a new recording, your Worktype will display on the LCD of the recorder.
2. Press and hold the [F1] button on the recorder to scan. The barcode information will display on the LCD.
3. Press the [F2] button to finish data input. Move the slide switch to the record position and begin dictating.
STEP 5: Configure your display options
When you connect your recorder and download your audio files, be sure to configure your software to display Option Item 1(Barcode information).
1. Open the Olympus DSS Player Pro Release 5.0.8 software. In the main window, right click on [File Name] and check [Option Item 1].
2. The Option Item column will appear.

3. Congratulations, you’re done!
Verification Source: In-house Testing
Verification Date: 12.28.11