Part of the added security functionality, The Philips DPM8000 has the ability to set exactly how much time, if any, the device remains accessible before it becomes locked, and needs to be unlocked by entering a password. The setup for this is fairly straightforward, but navigating the menus can be tricky, which is why Certified eSupport has created this handy HOW TO for you all. This guide will walk you through the process of: How to Configure Auto-Locking on the Philips 8000 Pocket Memo. Illustrated screen shots have been added for your convenience.
1. First, open the Philips SpeechExec Pro application.
2. On the Toolbar, Select the gear icon which will open the applications Setting Menu.

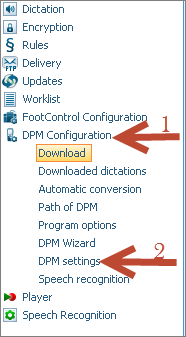
3. On the left, select [DPM Configuration1] then [DPM Settings2]
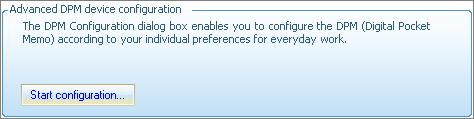
4. You will be presented with an Advanced DPM device configuration window, when that window opens, select [Start Configuration].
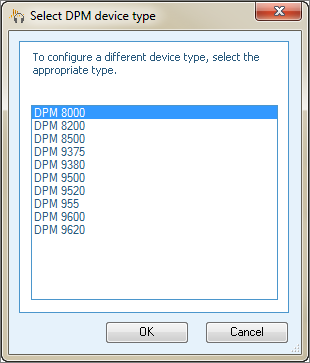
5. Connect and select your device. Note: If your device is already connected, you will not be prompted to select a device.
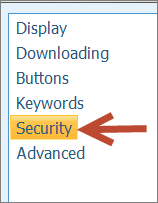
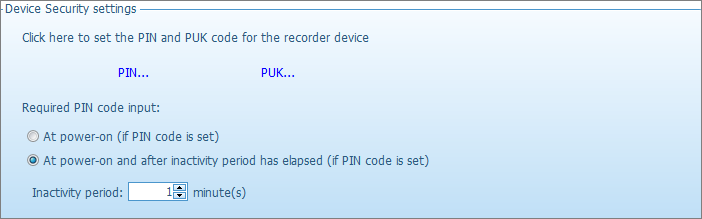
6. When the new windows appears, click on [Security].
7. Under the Device Security settings field adjust the Inactivity period to your liking, click [OK]. This setting will required a PIN to be entered of your choosing after the selected period of time.
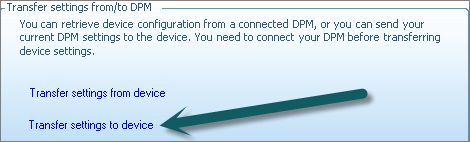
8. Finally select [Transfer settings to device] to upload the new settings Philips Pocket Memo.
Congratulations, you’re done! Now, if you set your Digital Pocket Memo down and walk away, depending on the amount of time you’ve set, it will automatically lock, keeping your data secure.