
How to create a user profile within DNS v10 using a Philips Digital Pocket Memo
WALKTHROUGH GUIDE #328
This ‘How to guide walks you through the process of creating a user profile within Dragon NaturallySpeaking v10 using a Philips Digital Pocket Memo. Illustrated screen shots have been included for your convenience.
STEP 1: Preparing the Recorder
1. Set the Recording Format to QP* mode if available. This can be set using the Menu of the Philips Digital Pocket Memo.
2. Set the Microphone Mode to Dictate. This setting can also be set through the Menu of the Philips Digital Pocket Memo.
3. Prior to creating your speech profile in Dragon NaturallySpeaking v10, make sure you have already installed the Philips SpeechExec software. The Security Dongle/Smart Key (Packaged with most Philips DPMs) is required for this software installation.
STEP 2: Creating your user profile in Dragon NaturallySpeaking v10 using a Philips DPM
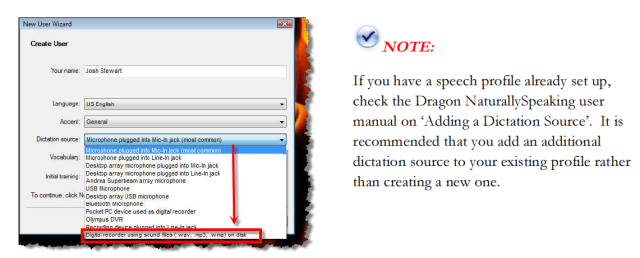
1. Open Dragon NaturallySpeaking. On the DragonBar, select [Dragon] > [Open User]. The Open User dialog box will open. Select [Next]. The following New User Wizard box will appear. Enter your name and select your preferred language, accent and vocabulary options. In the Dictation Source, select [Digital recorder using sound files (.wav, mp3, .wma) on disk].
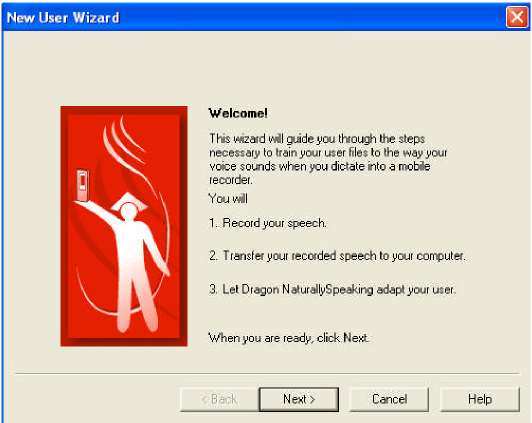
Record your speech 2. Transfer your recorded speech to your computer 3. Let Dragon NaturallySpeaking adapt your user.
STEP 3: Recording your Speech
1. Click [Next], you will be prompted to select a reading. Choose whatever story interest you and select whether you would like to [View] the story directly from your PC or [Print] it.
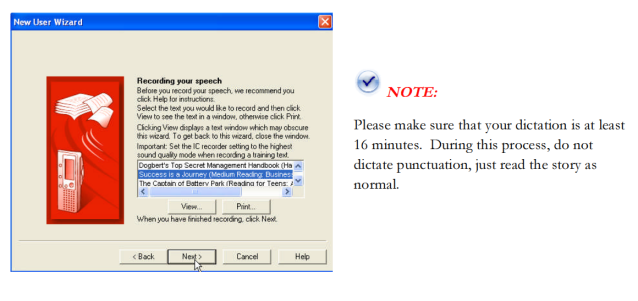
2. Once you’ve read for 16 minutes, click [Next].
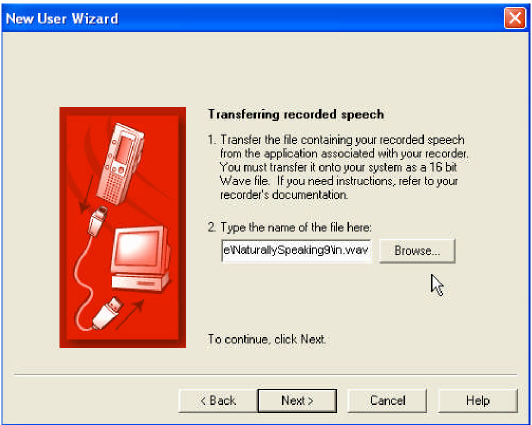
STEP 4: Transfer your recorded speech to your computer
1. You will now be prompted to transfer your recording from the Philips DPM onto your PC.
2. You’re probably wondering how to get the .wav file into your computer, good thing you’re reading a good walk through guide. Follow the next 5 steps to convert then import your training audio file into this application.
3. Open the Philips SpeechExec software. Go to [Settings]> [General Settings].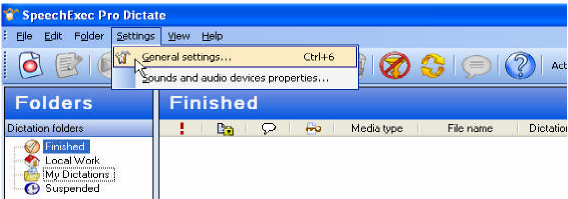
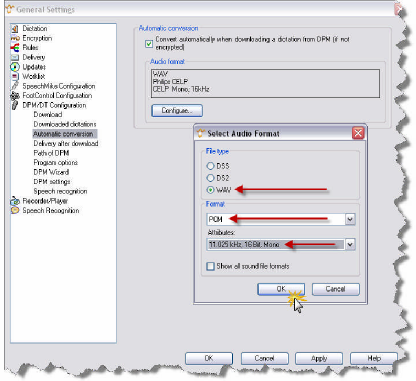
4. The General Settings dialog box opens, Click on [DPM/DT Configuration]> [Automatic Conversion]. Place a check mark in the box next to [Convert automatically when downloading a dictation from DPM (if not encrypted)]. Then select the [Configure] button, you will be prompted to select the audio format. Select [WAV] > [PCM]> [11.025 kHz, 16 Bit, Mono]. Click [OK].
5. Connect the Philips DPM to your PC, this can be done via USB cord or the docking station. It will take just seconds for the software to recognize the DPM, download and convert the file to your computer. Once the file has been transferred to the software. Right-click on the training file and select [Copy].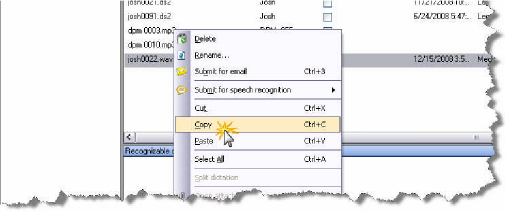
6. Close the SpeechExec Software and [Paste] the audio on your desktop.